 |
|
|||
FUN FOLDS |
||||
|
Begin with an 9
inch by 12 inch piece of construction paper |
 |
||||
|
|
 |
|
 |
||
| 1
Place the rectangle side ways on. Valley fold the left-hand side up to meet the top, thereby making a triangle. |
2 Cut along the side of the triangle. | 3
Save the rectangular piece of paper for the dinosaur’s legs. |
4 Open out the triangle into the square. Turn the square around to look like a diamond, making sure the existing fold-line is running horizontally across the paper. | ||
| Body | |||||
|
|
 |
 |
 |
||
| 5
From the right-hand corner, valley fold the
top and bottom sloping edges over to meet the middle fold-line, thereby making the kite base. |
6 Valley fold the right-hand point over to meet the vertical edges. Press it flat and unfold it. | 7 Turn the paper over. Valley fold the right-hand point over along the fold-line made in step 6. | 8 Valley fold the point over back out toward the right. | ||
|
|
 |
 |
|||
| 9 Valley fold the paper in half from bottom to top. | 10 Reach inside the model and pull out the... | 11 dinosaur’s neck. Press it flat, into the position shown in step 12. | |||
|
|
 |
||||
| 12 Reach inside the neck and pull out the... | 13 head. Press it flat, into the position shown, thereby completing the body. | ||||
| Legs
Use a remaining rectangle. If these legs are a bit too tricky, try the easier method below . |
|||||
|
|
 |
 |
 |
||
| 14
Place the rectangular piece of paper side ways on. Valley fold it in half from bottom to top. Press the paper flat and unfold it. |
15 Valley fold the sides over to meet the middle fold-line. | 16
Valley fold the centre edges out to points one- third of the distance to their adjacent sides, thereby making two bands of paper. |
17 Mountain fold the paper in half from bottom to top. | ||
|
|
 |
|
|
||
| 18 Open out the top bands of paper and squash them down neatly into the position shown in step 19. | 19 This should be the result. Turn the paper over. | 20 Open out the top bands of paper and squash them down neatly, thereby .... | 21 completing the legs. | ||
|
|
 |
||||
| 22 Insert the legs’ top edges underneath the front and back body flaps. There is a triangle pocket to tuck the body into the legs. |
23
Here
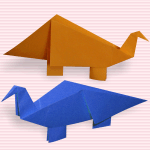
is the completed Apatosauras.
|
||||
|
|
 |
||||
|
24
From the left-hand point, valley fold the top sloping
edge over to lie along the bottom edge. Repeat behind.
|
25
Here
is the completed Dimetrodon.
|
||||
|
|
|
 |
|||
| 1 Use a remaining rectangle. Fold bottom up to the top. |
2
Unfold.
|
3
Cut in half along crease.
|
4
Fold in half.
|
||
|
|
 
|
||||
| 5 Fold top down. |
6
Staple as shown.
|
7
Here is the completing Apatosauras.
|
|||
|
Diagrammed by Katrin and Yuri Shumakov |
|||||


