 |
|
|||
FUN FOLDS |
||||

|
Put a square of paper on the table so it looks like a diamond. |
 |
||||
|
|
 |
 |
 |
||
| 1 Fold the left point over to meet the right point. Crease. Unfold. | 2 Fold the lower left and right sides up to meet the center crease. | 3 It looks like an ice-cream cone. Turn over. | 4 Fold the top point down as far as it will go. | ||
|
|
 |
 |
 |
||
| 5 Unfold the triangle you just made. | 6 Fold the top point down to the crease. | 7 Fold the folded edge down to the crease. | 8 Fold the whole top piece over the cone. Crease. | ||
|
|
 |
 |
|||
| 9 Fold the bottom point up to the top edge. | 10 Put your index finger along the lower edge. Fold the top flap down over your finger. | 11 Press it flat. This distance is slightly wider than top band. | |||
|
|
 |
 |
|||
| 12 Fold the left and right sides away from you as you fold the model in half. | 13 Pick up the model and pinch, as shown. Pull the roe over to one side. Press it flat. | 14 Now unfold the top layer. | |||
|
|
 |
 |
 |
||
| 15 Open left pocket and tuck right side in (except toe). | 16 Tuck left side into top band. | 17 Boot with closed back. | 18 Optianal: curl upward and blow into top to round leg. | ||
|
|
|
|
|||
|
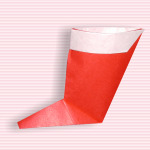
19
Here is the completed boot.
|
|||||
|
Diagrammed by Katrin and Yuri Shumakov |
|||||